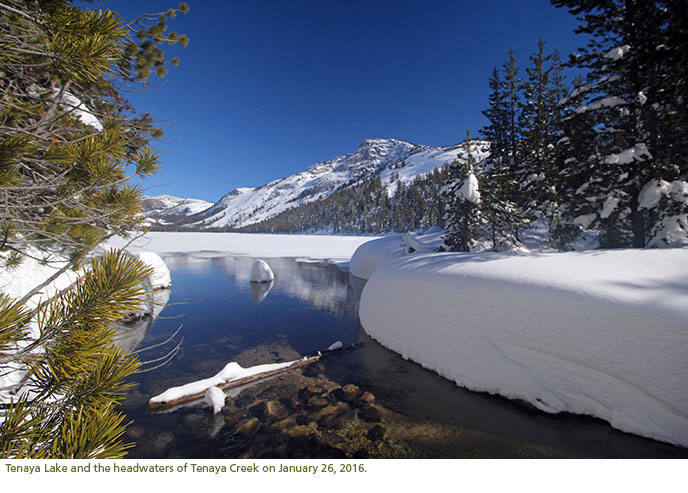
It’s summer, 100 plus degrees in Yosemite Valley, and it’s time to go up the Tioga Road for a swim in Tenaya Lake. Granite peaks and domes surround you and the sound of laughter of fellow swimmers breaks the inherent silence of the Sierra Nevada.
It’s winter, freezing temperatures once you get up the Snow Creek Trail, and you’re headed towards Tenaya Lake. Snow covers the granite landscape and muffles the sounds of your backcountry skis. If all goes well, there will be no swimming.
 Like in summer, there are bodies of water to cross when travelling in the wintry Yosemite Wilderness. But winter has that extra bag of tricks: it’s cold. For some, the coldness itself may not be much of an obstacle to overcome, but winter changes to a landscape can test anyone’s abilities and common sense. Instead of fording a creek, one is forced to walk over ice. If all goes well, there will be no swimming.
How do you know what ice is safe to traverse? Remember, this is the same stuff that compels you to fall down in the “safety” of your own driveway. This time, instead of concrete not-so-gently breaking your fall, icy water idly flows below the frosty path. If all goes well, there will be no swimming.
If you find yourself at an icy crossroad, follow these helpful hints:
- As always when travelling in a remote area, have an emergency safety plan. Tell people where you are going and when you plan to return. If something does go wrong while you are testing or traversing ice, already have in place the safety procedures that you will carry out for immediate rescue.
- Bring a spare set of warm, dry (non-cotton) clothes in a waterproof bag. You can reduce the risk of hypothermia by changing out of wet clothes as soon as possible. Other useful supplies to have as part of an emergency kit include an emergency blanket, hand and foot warmers, thick socks, an extra hat, and waterproof matches.
- While there are several visual cues to help you determine whether it is safe to step onto ice, measuring the thickness of the ice is key. There are many tools you can use to measure ice. An ice chisel can be stabbed into the ice until it penetrates all the way through. Generally, if the ice is thicker than 4 inches (10 cm), it is suitable for walking upon for about 200 pounds of weight. Any thinner and you run a high risk of swimming (all will not go well).
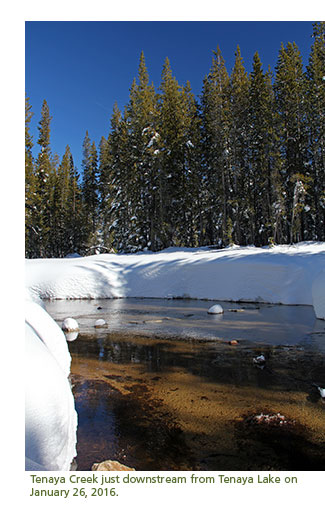
 Keep in mind that ice thickness can vary, in even in a small area and especially over and near moving water. Moving water impedes ice formation, so note where streams enter and leave a body of water.
- Larger bodies of water take longer to freeze than smaller ones. If you safely crossed a small pond earlier, don’t assume a larger lake will be frozen as well.
- Watch for signs like cracks, seams, pressure ridges, dark areas (where the ice is thinner) and slushy areas—even slight slush signals that the icing isn’t freezing at the bottom anymore, which means it’s getting progressively weaker.
- Avoid areas with protruding logs, brush, plants and docks. These structures can absorb heat from the sun and weaken the surrounding ice.
- Know how the weather has been recently. Temperature changes constantly; be extra cautious if warm spells have occurred recently. Also take note of the season: mid-winter ice is usually stronger than spring ice, which is subject to more sunshine and warmer temperatures.
- The color of ice hints can be a helpful indicator of ice strength, but don’t rely upon this alone. You should avoid Light-gray to dark-black ice, which indicates melting ice. White or opaque ice can be weaker due to air pockets. Blue or clear ice is very strong if it is thick enough (4 inches).
- Snow on ice can act as an insulator, warming up the ice. Ice under snow is generally thinner and weaker than ice without snow.
- If the ice is slushy, it is thawing and is getting progressively weaker. If dirt and other natural materials are resurfacing from thawing, it is not suitable for walking upon.
- Favor areas that receive less direct sunlight like a southern shore or tree-shaded areas. Cooler temperatures usually mean stronger ice.
- If you have made all these observation and feel confident, test the thickness of the ice. This works best with a buddy system with one person going forward and another hanging back on shore. Use ropes so your buddy can pull you back if something goes wrong.
- To reduce chances of breaking through weak ice, distribute your weight by wearing skis or snowshoes.
- Know what to do if a friend falls through the ice! Do not approach the hole they fell through; help from a distance with encouragement and a long assist. Use a rope, stick, or anything long and strong enough to carry the weight of your friend. Once they grab the assist, gently pull them out of the water. Encourage them to crawl towards safety with their legs spread wide to distribute their weight over the ice. Remove wet clothing as soon as dry gear is available.
- Know what to do if you fall through the ice! If you fall through ice, ditch any heavy gear that may weigh you down. Swim to the edge of the ice and, kicking your legs, propel as much of your upper body out of the water as possible. Position your lower body horizontally. Kick your legs and pull yourself out of the water. Once you are out of the water, do not stand! Crawl or roll away from the hole in the ice. Remove wet clothing as soon as dry gear is available.
Winter travel in the Yosemite Wilderness can be a beautiful, challenging, and life affirming experience. Be prepared and knowledgeable and, if all goes well, there will be no swimming.
