Lesson 5: The Economy of War
Table of Contents
Title
Overview
Museum Collections, Similar Items and Other Materials Used
National Educational Standards
Student Learning Objectives
Background and Historical Context
Vocabulary
Teacher Tips
Lesson Implementation Procedures
Evaluation/Assessment for Measurable Results
Extension and Enrichment Activities
Resources
Site Visit
Charts, Figures and Other Teacher Materials


A. The Winter at Valley Forge
  • Developers: Verena Calas, National Park Service Museum Educator, Washington D.C
  • Grade Level: 6-8 grades
  • Number of Sessions in the Lesson Unit Plan: 5
    [Back to top]
B. Overview of this Collection-Based Lesson Unit Plan
  • Park Name: This lesson unit plan draws on the extraordinary Valley Forge National Historic Park. Museum collections featured in the virtual museum exhibit at www.nps.gov/museum.
  • Description: Students will explore the challenges experienced by the Continental Army and its leadership, including General Washington, during their encampment at Valley Forge during the winter of 1777-1778 through object-based learning, hands-on activities, and active research. Students will work with and analyze primary source materials; including original Washington correspondence and other related documentation. Students will have the opportunity to make connections between the Revolutionary War period and the present by examining the similarities and differences between the original training manual of General Von Steuben and modern military manuals. Students will also practice analytical research, close reading, and debate skills through the examination of symbolism in colonial currency, the analysis of 18th century portraiture, and the discussion of women's role in the military.    
  • Essential Question: During the American Revolution, General Washington and the fledgling Continental Army encountered many obstacles. However, from the Valley Forge encampment they emerge an organized and trained fighting force. Therefore, what obstacles did soldiers encounter while at Valley Forge? And, what factors contributed its emergence as a trained professional fighting force?

    The following lesson plans are organized individually but make up a cohesive unit plan for "The Winter at Valley Forge". Teachers can choose to teach all five lessons as a unit, or each individually.

    Lesson Overviews
    • Lesson Plan 1: Daily Life at the Valley Forge Camp: This lesson introduces students to the challenges experienced by every day soldiers and their commanding officers during the winter at Valley Forge and explores how they dealt with these challenges not only physically, but mentally, as well.
      • Activity 1: Washington's Frustration
      • Activity 2: Rucksack Rummage
    • Lesson Plan 2: In Their Own Words: This lesson introduces students to the primary source documentation and analysis through the correspondence of men living in the Valley Forge encampment. Students will get another look into the challenges the camp presents as well as the emotional toll war can on the soldiers fighting it.
      • Activity 1: The Voices of Valley Forge
      • Activity 2: A Postcard Home
    • Lesson Plan 3: Von Steuben Makes an Army: This lesson explores the military training and tactics introduced by General Von Steuben at Valley Forge. Students will explore the importance of military manuals as modes of sharing information amongst large organized groups.
      • Activity 1: Who is Von Steuben?
      • Activity 2: Document Transcription and Translation
      • Activity 3: Creating a Manual
    • Lesson Plan 4: Remember the Ladies: This lesson explores the various rolls of women at the Valley Forge encampment. Students will compare the experiences of Valley Forge women to the changing rolls of American women in the military throughout history and partake in a class debate.
      • Activity 1: Who are the women of Valley Forge?
      • Activity 2: The Different Women of War, Independent Research
      • Activity 3: Class Debate
    • Lesson Plan 5: The Economy of War: 
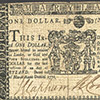
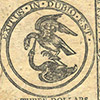
This lesson explores the different kinds of currency and symbolism used not only in the Valley Forge Camp, but in the Thirteen Colonies at large. Students will also engage in the mathematical exchange of money.
      • Activity 1: Symbolism in Colonial, Continental, and Modern Currency
      • Activity 2: Redesign of the Dollar Bill
      • Activity 3: Converting Currency

      [Back to top]
C. Museum Collections, Similar Items and other Materials Used in this Lesson Unit Plan
This lesson introduces students to the challenges experienced by every day soldiers and their commanding officers during the winter at Valley Forge and explores how they dealt with these challenges not only physically, but mentally, as well.
MUSEUM OBJECT [photos of objects in the Parks museum collections] SIMILAR OBJECTS [local items similar to museum objects] & OTHER MATERIALS Length of time

Activity 1: Symbolism in Colonial, Continental, and Modern Currency

Maryland Currency Continental Currency

Maryland Currency

Continental Currency
New Jersey Six Shillings Maryland One Dollar

New Jersey Six Shillings

Maryland One Dollar

Similar Items [similar to objects in the Park museum collection]:


55 minutes

Activity 2: Redesign of the Dollar Bill

Similar Items [similar to objects in the Park museum collection]:


  • Images of Colonial and Continental Money
  • U.S. and foreign currency in multiple denominations
  • Cardstock paper
  • Pens and pencils
  • Markers of assorted colors
  • Crayons/colored pencils of assorted colors
  • Glue
  • Construction paper of assorted colors
  • Copies of New York Times Article Harriet Tubman Ousts Andrew Jackson in Change for a $20
  • Redesign of the Dollar Bill Instruction Sheet
  •  

45
minutes

Activity 3: Converting Currency

Similar Items [similar to objects in the Park museum collection]:


55 minutes

[Back to top]
D. National Educational Standards

NSS-USH 5-12 Era 3 – Revolution and the New Nation (1754-1820's)

Standard 2
Understands the impact of the American Revolution on politics, economy, and society

Common Core Standards
CCSS.ELA-LITERACY.RH.6-8.7
Integrate visual information (e.g., in charts, graphs, photographs, videos, or maps) with other information in print and digital texts.

National Core Arts Standards

VA:Cr2.3.8a

Select, organize, and design images and words to make visually clear and compelling presentations.

[Back to top]
E. Student Learning Objectives

Objectives
  • SWBAT analyze the symbols and language used in colonial, continental, and modern currency and their changes over time.
  • SWBAT use mathematical conversion factors to perform conversions in with 18th century money

Skills
  • SWBAT to analyze visual symbolism in primary sources.
  • SWBAT to apply math skills to primary sources.

[Back to top]
F. Background and Historical Context
Colonial Currency PowerPoint

[Back to top]

G. Vocabulary

Currency: something (as coins, treasury notes, and banknotes) that is in circulation as a medium of exchange; a common article for trade or bartering.
Barter: to trade goods or services in exchange for other goods or services.
Wampum: beads of polished shells strung in strands, belts, or sashes and used by North American Indians as money.
Commodity Money (“Country Pay”): money whose value comes from the commodity they are made from such as gold, silver, copper, salt, and tea.
Bills of Credit: a note designating a promise to pay in the future.
Counterfeit: made in imitation of something else with the intent to fool or deceive.

H. Teacher Tips
  • Reduce the number of currency used in activities to allow for time constraints.
  • Allow students to work in groups for currency redesign instead of individually, depending on class size.


[Back to top]
I. Lesson Implementation Procedures
Lesson 5, Activity 1: Symbolism in Colonial, Continental, and Modern Currency
Time Instructional Sequence Teacher Narration Exemplary Responses & Follow Up Questions
5 mins Print out sets of colonial and continental currency and laminate.
  • If double-sided printing is available then print this way, if not affix the front and backs of the currency together to reflect their original position.
Gather different denominations of U.S. and foreign currency.

Pre-cut dollar sized pieces of cardstock for students’ redesigns.

Create easily accessible art supplies station. Allow students to share with a partner
5 mins Post the following questions on the board and allow students to answer.
  • Before paper and coin money, how might have Americans “paid” for necessary supplies? Why make the change to paper and coin money? And how do we know that a piece of paper or metal is “worth” something?


Allow students to share their responses.

Early colonists might have traded goods between each other.
Early colonists might have used different objects in place of traditional currency or money.
We know a coin is worth something because of the material it is made out of and how much of that material is in the coin.
Paper money is easier to carry around compared to coins. It represents a certain amount of money and has value because everyone agrees that it does.
15 mins Present background information on colonial and continental money via provided Colonial Currency PowerPoint presentation (slides #1--8)
20
mins
Break students into groups of 2 to 3 students.

Give each group an individual set of colonial/continental/modern money.

With magnifying glasses ask the groups to do a close look of the currency and fill out their observation handouts (provided).

10
mins
Using Colonial Currency PowerPoint (slides #9-13) go over the symbols and their meanings with the entire class.

Lesson 5, Activity 2: Redesign of the Dollar Bill
Time Instructional Sequence Teacher Narration Exemplary Responses & Follow Up Questions
5 mins Handout Redesign Dollar Bill worksheet

Go over instructions with entire class.
Students are tasked with creating their own redesign of the American Dollar Bill.

Redesigns must follow the general format of the currencies studied in class. Therefore they must include:
  • At least ONE historical figure of the student’s choosing.
  • At least ONE element or scene from American History or culture.
  • At least ONE saying or phrase.
  • At least ONE traditional currency element (something that has already been used in either colonial, continental, or modern currency).
  • Students should keep in mind that currency is designed to prevent counterfeit!
10 mins Read New York Times article Harriet Tubman Ousts Andrew Jackson in Change for a $20

30 mins Allow students to gather art supplies and card stock.

Independent design time.

Display redesigned currency when finished.


Lesson 5, Activity 3: Converting Currency
Time Instructional Sequence Teacher Narration Exemplary Responses & Follow Up Questions
10 mins Post the following question on the board for students to answer and discuss:
  • Would a Continental Dollar in 1775 be equivalent to a U.S. Dollar in 2017? If yes, explain why. If no, explain whether it is worth more or less in today’s money.
Allow students to discuss their responses with a partner.


A continental Dollar in 1775 would not be equivalent to a U.S. Dollar in 2017. I think a Continental Dollar would be worth more in today’s money because I know that you could buy a lot with one dollar in the past. (i.e. My grandpa told me a story about how a McDonald’s Big Mac was only 50 cents in 1968 and today we pay more for the same thing.)
40 mins Hand out Converting Currency worksheet.

Discuss the conversion chart at the top of the sheet and do the example questions with the entire class

Allow students to work independently to complete the worksheet.

Go over answers with entire class.


J. Evaluation/Assessment for Measurable Results
  • Completed redesign of dollar bill.
  • Completed conversion worksheet.
K. Extension and Enrichment Activities
[Back to top]
L. Resources
Other Materials Listed in Sections C
M. Site Visit

N. Charts, Figures and other Teacher Materials

Supplementary Materials Listed in Sections C

Download All Supplementary Materials

Lesson Title Page(s)
Lesson 5, Activity 2 Redesign of the Dollar Bill Instruction Sheet 24