|
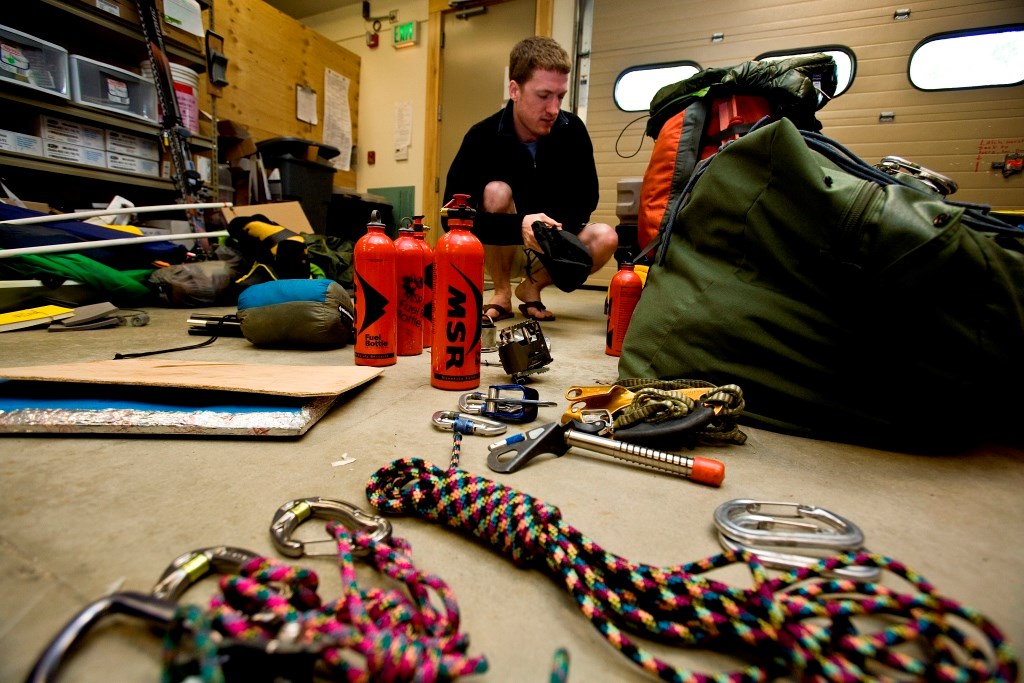
The following section is not intended to be a complete gear list for your expedition, but rather some important Mount McKinley-specific considerations when putting your kit together. There are a number of excellent equipment lists found in Alaska Range guide books and other expedition planning sources. The Frequently Asked Questions About Mountaineering page also includes more in depth discussion on suggested equipment.
NPS Photo/Ian Shive Footwear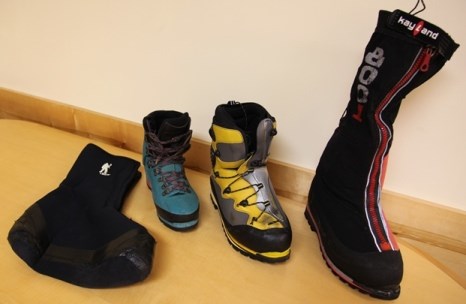
NPS Photo The boots you select for Mount McKinley will be among your most important pieces of equipment. Frostbite to your extremities can have a devastating impact on the rest of your life, so select the warmest and highest quality boots you can afford. Boots should not only keep your feet warm in extreme cold (temperatures on the upper mountain are commonly -30 F to -40 F), they also need to be comfortable and designed for climbing on moderately technical snow, ice, and mixed terrain. 'Integrated boots' are designed specifically for cold, high altitude environments and should feature a removable liner, the boot shell, and a built-in insulated gaiter. Plastic double boots with a separate neoprene overboot also work well on Mount McKinley. Consider a thermo-molded liner for added warmth and comfort. Be sure to field test your footwear, ideally in cold temperatures and comparable terrain, before your expedition. Ensure a good, comfortable fit and that the boot, the overboot, and crampons integrate well together. ClothingThe clothing layers you select for your expedition will need to cover a wide range of temperatures and conditions. As with footwear, your clothing should be of the highest quality and be familiar to you prior to the expedition.
Expedition weight down parka with a good hood Rather than one single large parka, many Mount McKinley climbers bring a modular system of one lighter weight parka and one moderate to heavy weight parka to allow flexible layering for changing conditions. The outermost insulated parka needs to fit over all over clothing and jacket layers, including a hood designed to fit over a climbing helmet and to keep out blowing wind and snow. Insulated Pants "Puffy" pants of either down or synthetic insulation are great for either relaxing in camp or climbing in colder conditions. Full length side zips are highly recommended. Hardshell Jacket and Pants Should be waterproof, breathable, and durable. The jacket should have a hood that fits over your climbing helmet. Full length side zips are highly recommended so they can be put on without having to take off other layers, boots, or climbing harnesses. Mittens Expedition weight mittens are critical in avoiding frostbitten fingers. Removable liners allow for better drying. Face Protection Countless combinations of face masks, balaclavas, Buffs, brimmed hats, and goggles are all seen on Mount McKinley. Make sure your system leaves no gaps in coverage on the face, forehead, and neck to avoid frostbite and sun exposure. Also ensure adequate ventilation to avoid fogging up your goggles or glasses. Camp Booties Though some consider booties a luxury item, giving your feet a rest from mountaineering boots can improve both morale and the health of your feet on a longer trip. Many climbers overlook the potential for intense heat on the lower glacier, especially later in the season. Be prepared for hot sunny days and intense glare with a good sun hat and reflective white shirt. Rain is not uncommon either.
Teams hiking in for their climb (Muldrow Glacier, etc.) during the summer months should bring headnets, effective mosquito repellent, and mosquito netting for tents. Footwear selection for these approaches should consider the need to cross multiple rivers and streams.

NPS Photo/Reichert Sleeping Bags and PadsAn expedition quality sleeping bag is essential. Down or synthetic fiber filled bags rated to -20ºF (minus 29ºC) is the minimum acceptable. Early season climbers may consider a warmer bag to minus -30F or -40F. Down bags are generally preferable for their lighter weight and smaller size. Bags with a highly water resistant shell material are recommended as down can lose its insulating ability when wet. Your bag size should allow you to sleep with a layer or two of clothing, plus some extra items in your sleeping bag (water bottles, boot liners, etc.), but not so roomy that you have dead space that will lead to cold spots. Most climbers bring two sleeping pads, one closed cell foam pad and one inflatable insulated pad. Thicker insulated pads may be sufficient as a single pad, but some redundancy is nice in case your pad is lost or damaged. For inflatable pads, bring a repair kit that will work in colder temps. Sleds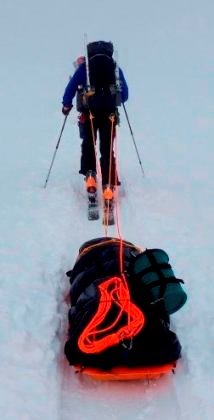
NPS Photo/Gentzel Nearly all Mount McKinley climbers bring along a sled to help them move heavy loads of food and equipment on the lower glacier. Most local air taxis offer basic plastic sleds for use during your trip, though confirm availability and style in advance. When rigging the sled for glacier travel: Keep the sled's center of gravity low with heavier items on the bottom of the sled/duffel and lighter items on top. Distribute weight evenly from front to back. A top-heavy load is difficult to manage and will roll in traversing terrain. Attach your sled pulls or polks near your own center of gravity, i.e. near or on the waist belt of your backpack. Otherwise, the weight of your sled will pull you off balance and increase the fatigue factor exponentially. Have a redundant attachment system so that if one attachment point fails, another is there to back it up. Every year climbers have lost sleds, and several fatalities have occurred as a result of climbers chasing sleds that have gotten away from them. Some method of braking or slowing your sled down while descending steeper terrain is very useful, such as a simple loop of cord or webbing that runs under the sled. Snowshoes or SkisSome manner of flotation is highly recommended. In addition to making travel easier, skis or snowshoes also increase your safety margin by dispersing your weight while crossing snow bridges over crevasses. Be familiar with your chosen travel method, and be sure to have items needed to repair your skis or snowshoes in the field. Stoves and Cooking SystemsQuality, efficient stoves are your critical link to food and water. Ensuring your stoves are in good working order is of utmost importance. Additionally, having some redundancy (multiple stoves) in case of a failure is essential. Repair kits for your chosen model of stove and knowledge of how to maintain and repair them in the field is also key. White gas stoves have been a staple on Mount McKinley for decades and they continue to provide reliable performance in cold weather and at high altitude. White gas is available for purchase through your air taxi. Fuel usage can vary quite a bit from team to team based on your meal planning and water needs. For a three week trip, most groups plan for one gallon per person, with one extra gallon for the team. Cartridge stoves are sometimes used on Mount McKinley, but they don't tend to perform as well in cold conditions, the cartridges are not as widely available, and they aren't as efficient for making large batches of water and food. However, some groups opt to take one canister stove in addition to their white gas stoves for quick and easy water production or as an emergency stove on summit day. A flame resistant cook board is a huge help in providing a level platform for using stoves and heavy water pots. Many groups find a separate well-ventilated cook tent to be helpful to get out of your sleeping tent and have alternate shelter during extended storms. Stove operation should occur outside of the tent. Under extreme conditions, members of a party may be forced to cook inside the tent. If so, cooking must be done at the entrance, with plenty of ventilation. Never cook without adequate cross ventilation! Avoid lighting the stove while inside the tent. 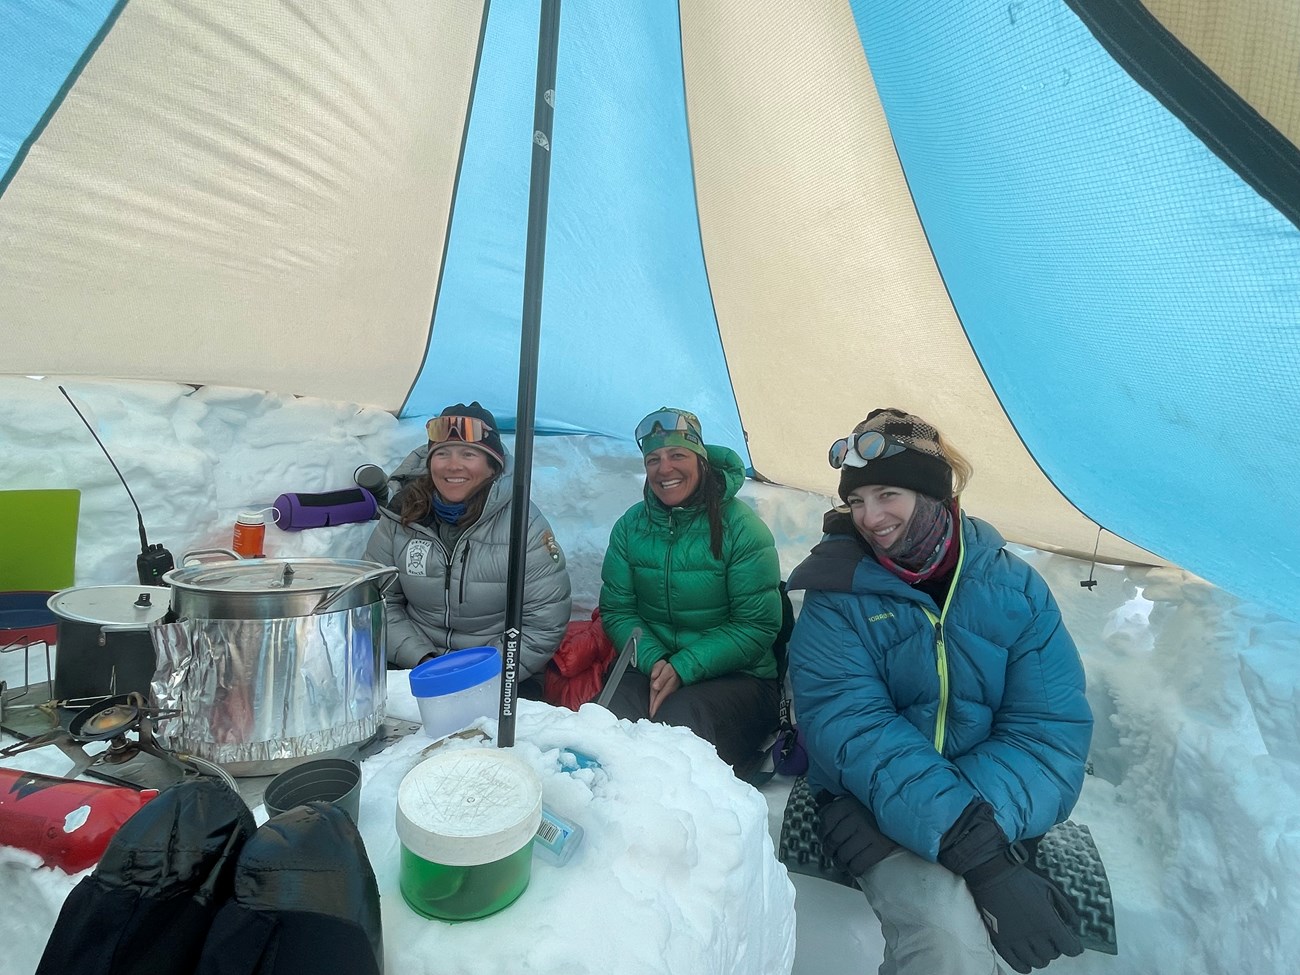
FoodPlan for three weeks of food for the West Buttress, consisting of 4,000 to 5,000 calories per person per day. Each climber should plan on consuming at least four liters of fluid per day. Good hydration hastens acclimatization and prevents dehydration. Be sure to repackage food before you depart for the mountain to minimize garbage. Anchorage has numerous retailers who sell freeze dried, dried, bulk, and other food at prices equivalent to other areas in the United States. If you access the mountain by air, plan a base camp food cache in the event that bad weather delays your flight out at the end of your climb. Use proper caching techniques; if the cache is not labeled properly, the mountaineering rangers will conclude that it was abandoned, and remove it. If you are planning to traverse through the lowlands, you should be prepared to prevent giardia by filtering or boiling your water, or using water purification tablets. Giardia cysts have been found in lakes and streams on both the north and south sides of the Alaska Range. For safety when travelling in bear country, cook 50 to 100 meters (150 to 300 feet) away from your camp to avoid attracting bears to your camp with cooking smells. After cooking, all food, garbage, pots and other utensils should be triple packaged in large plastic bags and placed 100 meters from the camp in a different location than where you cooked, but in a spot that can be observed from your tent. Please take care to recycle and minimize waste.
Snow Shovels and Saws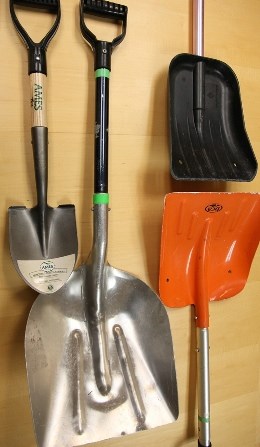
NPS Photo Larger, sturdy avalanche style shovels are preferred over smaller and lighter weight models. At least one steel spade is helpful to chip through the hard layers often found above 11,000 feet (3414 m) on the West Buttress. An aluminum or plastic grain scoop is effective at moving large amounts of snow quickly. A smaller plastic shovel is also nice to have along to remove snow from fragile tent flies that are easily damaged by metal shovels. Snow saws are the only functional means of constructing adequate snow block walls that you will need to protect your camps on the upper mountain. Each party should have at least two, and larger groups might consider bringing a few more. Again, larger and more durable saws are preferable to smaller and lighter weight saws that tend to break and be less functional in hard snow and ice. TentsSpare no expense on your expedition-quality tent as it can mean the difference between life and death during a ferocious storm on Mount McKinley. Bring a shelter that you are confident will function well in areas of high wind exposure. It is generally better to have a little more room to spread out as opposed to trying to cram into tents. Being a longer trip with lots of space-consuming gear, most climbers find that under-stuffing your tent by one person (two people in a three person tent, three people in a four person, etc.) allows enough room to spread out, dry out, and keep necessary equipment inside the tent during prolonged bad weather. Having several tents in a given party is also nice redundancy if one tent disintegrates or gets lost in a storm. Extra poles and repair materials are important in case of damage caused by storms. Plan to take extra pickets, wands or deadmen for tent anchors. Never leave a tent without anchoring it securely. Tents are lost each year due to sudden gusts of wind while the tent was left unattended or drying. 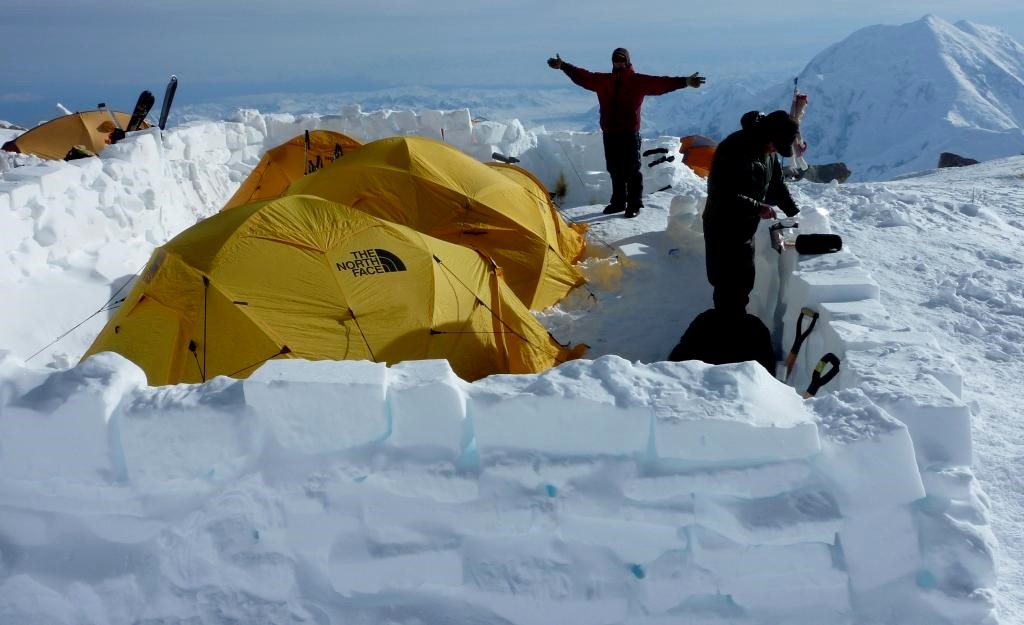
NPS Photo/Shain Snow walls should be constructed around tents for protection from winds. However, even the best walls and tents will not provide comfort and rest during severe wind storms. Snow walls collapse and tents fail each year. Furthermore, the noise of flapping tents can become nerve-wracking, causing significant mental and physical fatigue. Winds in excess of 80 miles per hour (130 km/h) are common and may last many hours or days. Always be prepared for a tent failure and know how to build a snow shelter. A note on snow shelters: All party members should have a plan for building a snow shelter in the event you get caught out in a storm or find yourself without your tent for any number of reasons. Snow shelters have saved countless lives on Mount McKinley. Both limbs and lives have been lost for inability to build a snow shelter. A small steel shovel is invaluable for digging into the hard ice found high on Mount McKinley or Mount Foraker. Brush up on snow shelter construction prior to your climb and always allow for good ventilation while cooking. RopePreferences for climbing ropes vary, and your choice of rope depends on what you are planning to do with it. From a purely glacier travel perspective, a 50 to 60 meter low stretch rope between 9mm and 10.5mm is generally thought of as ideal. There are advantages and disadvantages to low stretch ropes but from a crevasse rescue perspective, low stretch ropes usually mean shorter crevasse falls and easier extraction compared to dynamic ropes. Dynamic ropes should still be used for climbing that involves the potential for dynamic events such as factor one or factor two falls. Longer ropes allow for more team members on a given rope without having to compromise on ideal spacing between team members. Crevasses in the Alaska Range are quite large and more space between climbers is typically better than less. Three climbers on a 60 meter rope will be able to space themselves 15 meters (45 feet) apart while still having 7-8 meters of rescue coils to be carried at either end. For medium sized teams, splitting up into two rope teams for travel allows for two ropes to be used by the group. This allows more options for travel strategy and for rescue and is generally preferably to trying to cramp five or six climbers onto one rope. Ice AxesPersonal preference seems to be the biggest factor when it comes to ice axe selection. Some climbers prefer their axe be very durable for chipping ice and making tent platforms, placing pickets, etc. Others select a very light axe to use while snow climbing on small portions of Mount McKinley's less technical routes, and then bring additional tools for placing pickets (a hammer) and for making tent platforms in icy conditions (spade). Regarding length, again there are two schools of thought: some climbers like a longer axe that they can use on the lower angle and moderate slopes as well as the higher angle slopes on the upper mountain. Others believe an axe is only needed on the steeper sections on the upper mountain, thus a short, light axe makes more sense from a weight and space point of view. On average, most climbers wind up somewhere in the middle and select a well-built 60–70 cm mountain axe and use it in addition to their trekking poles throughout their climb. An ability to adequately self-arrest is important at all points on the route and should be considered even on the flat lower glacier. When climbing on firm surfaces, it is difficult to arrest a fall without an axe or tool such as a whippet trekking pole. We highly recommend adding some form of insulation (hockey tape, foam) to the head of your ice axe to reduce potential for frostbite in colder temperatures. CramponsBring steel crampons that work with your combination of boots, overboots and gaiters. Strap-on, step-in, or new-matic style crampons are all fine so long as they work with the rest of your footwear equipment. Again, field test your equipment well in advance of your expedition, ideally in the context of a real climb. Aluminum crampons can be tempting to bring due to their light weight, but aluminum does not hold up well to the use and abuse of climbing hard ice and walking on rock. Be sure to bring whatever spare parts and pieces and tools you may need to repair crampons in the field. 
Crevasse Rescue EquipmentCrevasses are an ever-present hazard on Mount McKinley from the moment you step onto the glacier until the moment you step off. Every team member should be well-versed in crevasse rescue procedures when travelling in glaciated terrain. In terms of equipment, at minimum, climbers should have:
Sleds and heavy backpacks introduce some very problematic variables into the crevasse rescue process, and teams should spend some time practicing with these elements in place. Snow, Ice, and Rock AnchorsTwo foot (60cm) snow pickets are the standard snow anchor used by most teams on Mount McKinley. Pickets are used as running protection on steeper parts of the route, tent anchors, and for anchor building in crevasse rescue scenarios. You should plan on bringing enough of these to be able to use them for all of these purposes at the same time. Generally each team member will have one picket on them and readily available for crevasse rescue and then several more split up and packed away as part of group equipment. Having a longer (3-foot or 90cm) picket or two is a good idea in the early season when snow can be less consolidated. Each group should have a couple of ice screws for running protection and anchor building. Ice is rare below 15,000-feet (4572 m) on the West Buttress, but in low snow years there can be a few places on the route that warrant placing an ice screw for protection. On the upper mountain it is more common to encounter ice or very firm snow that cannot be protected with pickets, and thus ice screws may offer your only protection. On the West Buttress, there generally isn't a need to bring rock protection beyond some longer slings and webbing that can be used to sling boulders and rock features on the ridge between the top of the fixed lines and high camp at 17,200 feet (5242 m). Goggle and Glacier Glasses
NPS Photo/Westman High quality eye protection is a necessity to avoid snow blindness. Many climbers bring two pairs of sunglasses, one for more normal lighting conditions and one for very bright days; the redundancy is also advised as sunglasses are easily broken or lost. Photochromic lenses that change based on light conditions are great as long as they get dark enough for the really bright days. Medical KitsYour medical kit needs to address a wide range of potential problems: severe trauma, burns, blisters, altitude illness and more. Although emergency medical care is often available on Mount McKinley, emergency help cannot always reach your location in a timely manner. BE PREPARED. Your medical kit and the level of training and experience in wilderness first aid may make the difference between life and death. All teams on Mount McKinley should strive to be self-sufficient. Communication and TechnologyCommunication options on Mount McKinley and elsewhere in the Alaska Range have improved in recent years. Satellite (Sat) phones are the most reliable form of two-way communication on Mount McKinley. Nevertheless, even satellite phones can occasionally drop signals or otherwise malfunction. Small handheld radios such at the FRS (Family Radio Service) and GMRS (General Mountain Radio Service) have become almost standard equipment on Mount McKinley. They are useful for communicating between members of your party if you split up, as well as communication with other teams on the mountain. Furthermore, the NPS rangers monitor Channel 1 on the FRS frequency from their camps at 7,200- and 14,200-feet. Coverage and range of these units isn't perfect, but typically you will be able to communicate with a nearby team assuming they have their radio on. FRS/GMRS radios have differing levels of broadcast signal strength and the antennas (ability to receive) also vary in quality and ability. Do a little research and get the best quality radios you can. A few of the flight services offer radio rental while on your trip. Aviation band radios are still used by some groups but they are fairly specific in their function. They can communicate with aircraft directly if an aircraft is in the vicinity, which could be helpful on more remote routes in the range and on Mount McKinley. Inquire with your flight service about rental and frequencies. Personal Locator Beacons (PLB) and text messaging/GPS units such as the SPOT device are increasing in popularity. In general these units don't allow for two-way communication making them less ideal for emergency traffic, but they can be effective for some purposes if used appropriately. We have had several recent instances of GPS positions being incorrectly reported and/or not reaching their intended target. Denali's policy on responding to these types of issues is that we can't respond immediately to a report of a missed transmission alone, but will investigate emergency alerts from these devices and instances where there has been a string of missed communications. VHF and UHF radios are carried by some parties but these cannot be reliably used for emergency traffic as general frequencies are not monitored and NPS channels are for internal use only. Cell Phones can sometimes be used on the upper mountain but coverage and reliability varies widely with carriers and phone make and model. Phones that use an Alaska service provider such as ACS or GCI seem to be the best option and pre-paid phones are available from each company. GPS units are very useful for marking tracks, navigating in white outs, marking cache and camp spots and position reporting in the event of an emergency. As with most of your gear, proper training and experience is needed to use these tools well. A note on technology in remote environments: Technology has a tendency to fail us just when we need it most. This trend is even more common in cold, wet, harsh environments which can wreak havoc on fragile equipment. Batteries die, the cold kills circuit boards, plastic housings break, etc. Your best contingency plan will always be self-sufficiency. Even when communication devices do work, rescue help cannot always reach you in a timely manner. Please see our rescue policy for more information on emergency response in Denali National Park and Preserve. Trail Markers (Wands)
NPS Photo/Luks Every West Buttress expedition should carry a supply of 40 to 50 wands (3 to 4 foot bamboo garden stakes are typical) to mark the trail, cache sites, crevasses and probed areas. Although by mid-season much of the climbing route is already wanded, these wands blow down, melt out, or are removed by other teams and thus your team should be prepared to place more. Your wands should include a piece of flagging or tape at the top to identify them as yours so you can be sure to retrieve your wands on your descent. Expedition on less travelled routes should plan on bringing a larger supply of wands (200+) as you cannot rely on the wands from previous parties. For marking caches several wands should be taped together forming a sturdy marker 2 meters (approximately 6 feet) above the snow when marking caches below 14,200 feet (4328 m). Each cache marker needs to have one of your issued cache tags fixed to it, more on this in the cache marking procedures section.
Repair KitIn addition to item-specific repair kits like those you should have for your stoves, tents, etc., a more general repair kit can save the day. Some items to consider include:
Jump to Other Required Reading:
|
Last updated: December 31, 2025
