Last updated: December 11, 2021
Article
Sew an American Shad

Difficulty: Confident Beginner - Intermediate
Materials:
- Sewing machine or hand needles
- ½ yard of fabric (see below for fabric options)
- Matching thread
- Corner turner, chopstick, pencil, or another similar tool
- Stuffing (store-bought, fabric scraps, old socks, etc.)
- Two buttons and/or embroidery thread
- (Optional) Fabric paint, etc. for embellishments
- Pattern (at the bottom of this page)
A note on fabric choice: A plush, midweight fabric, such as felt, would work great for this project. For a realistic fish, you could also go with a shiny or scaly patterned fabric. However, you'll want to use fusible interfacing or quilting to strengthen the fins if using a lighter fabric. This is also a great opportunity to use up fabric scraps!
Terminology:
Right side: The side of your fabric that you want to face outwards on your finished project
Wrong side: The side of your fabric you want to hide
Seam allowance: An area of fabric left between the stitching line and the cut edge of the fabric
Instructions
Cut the pattern pieces
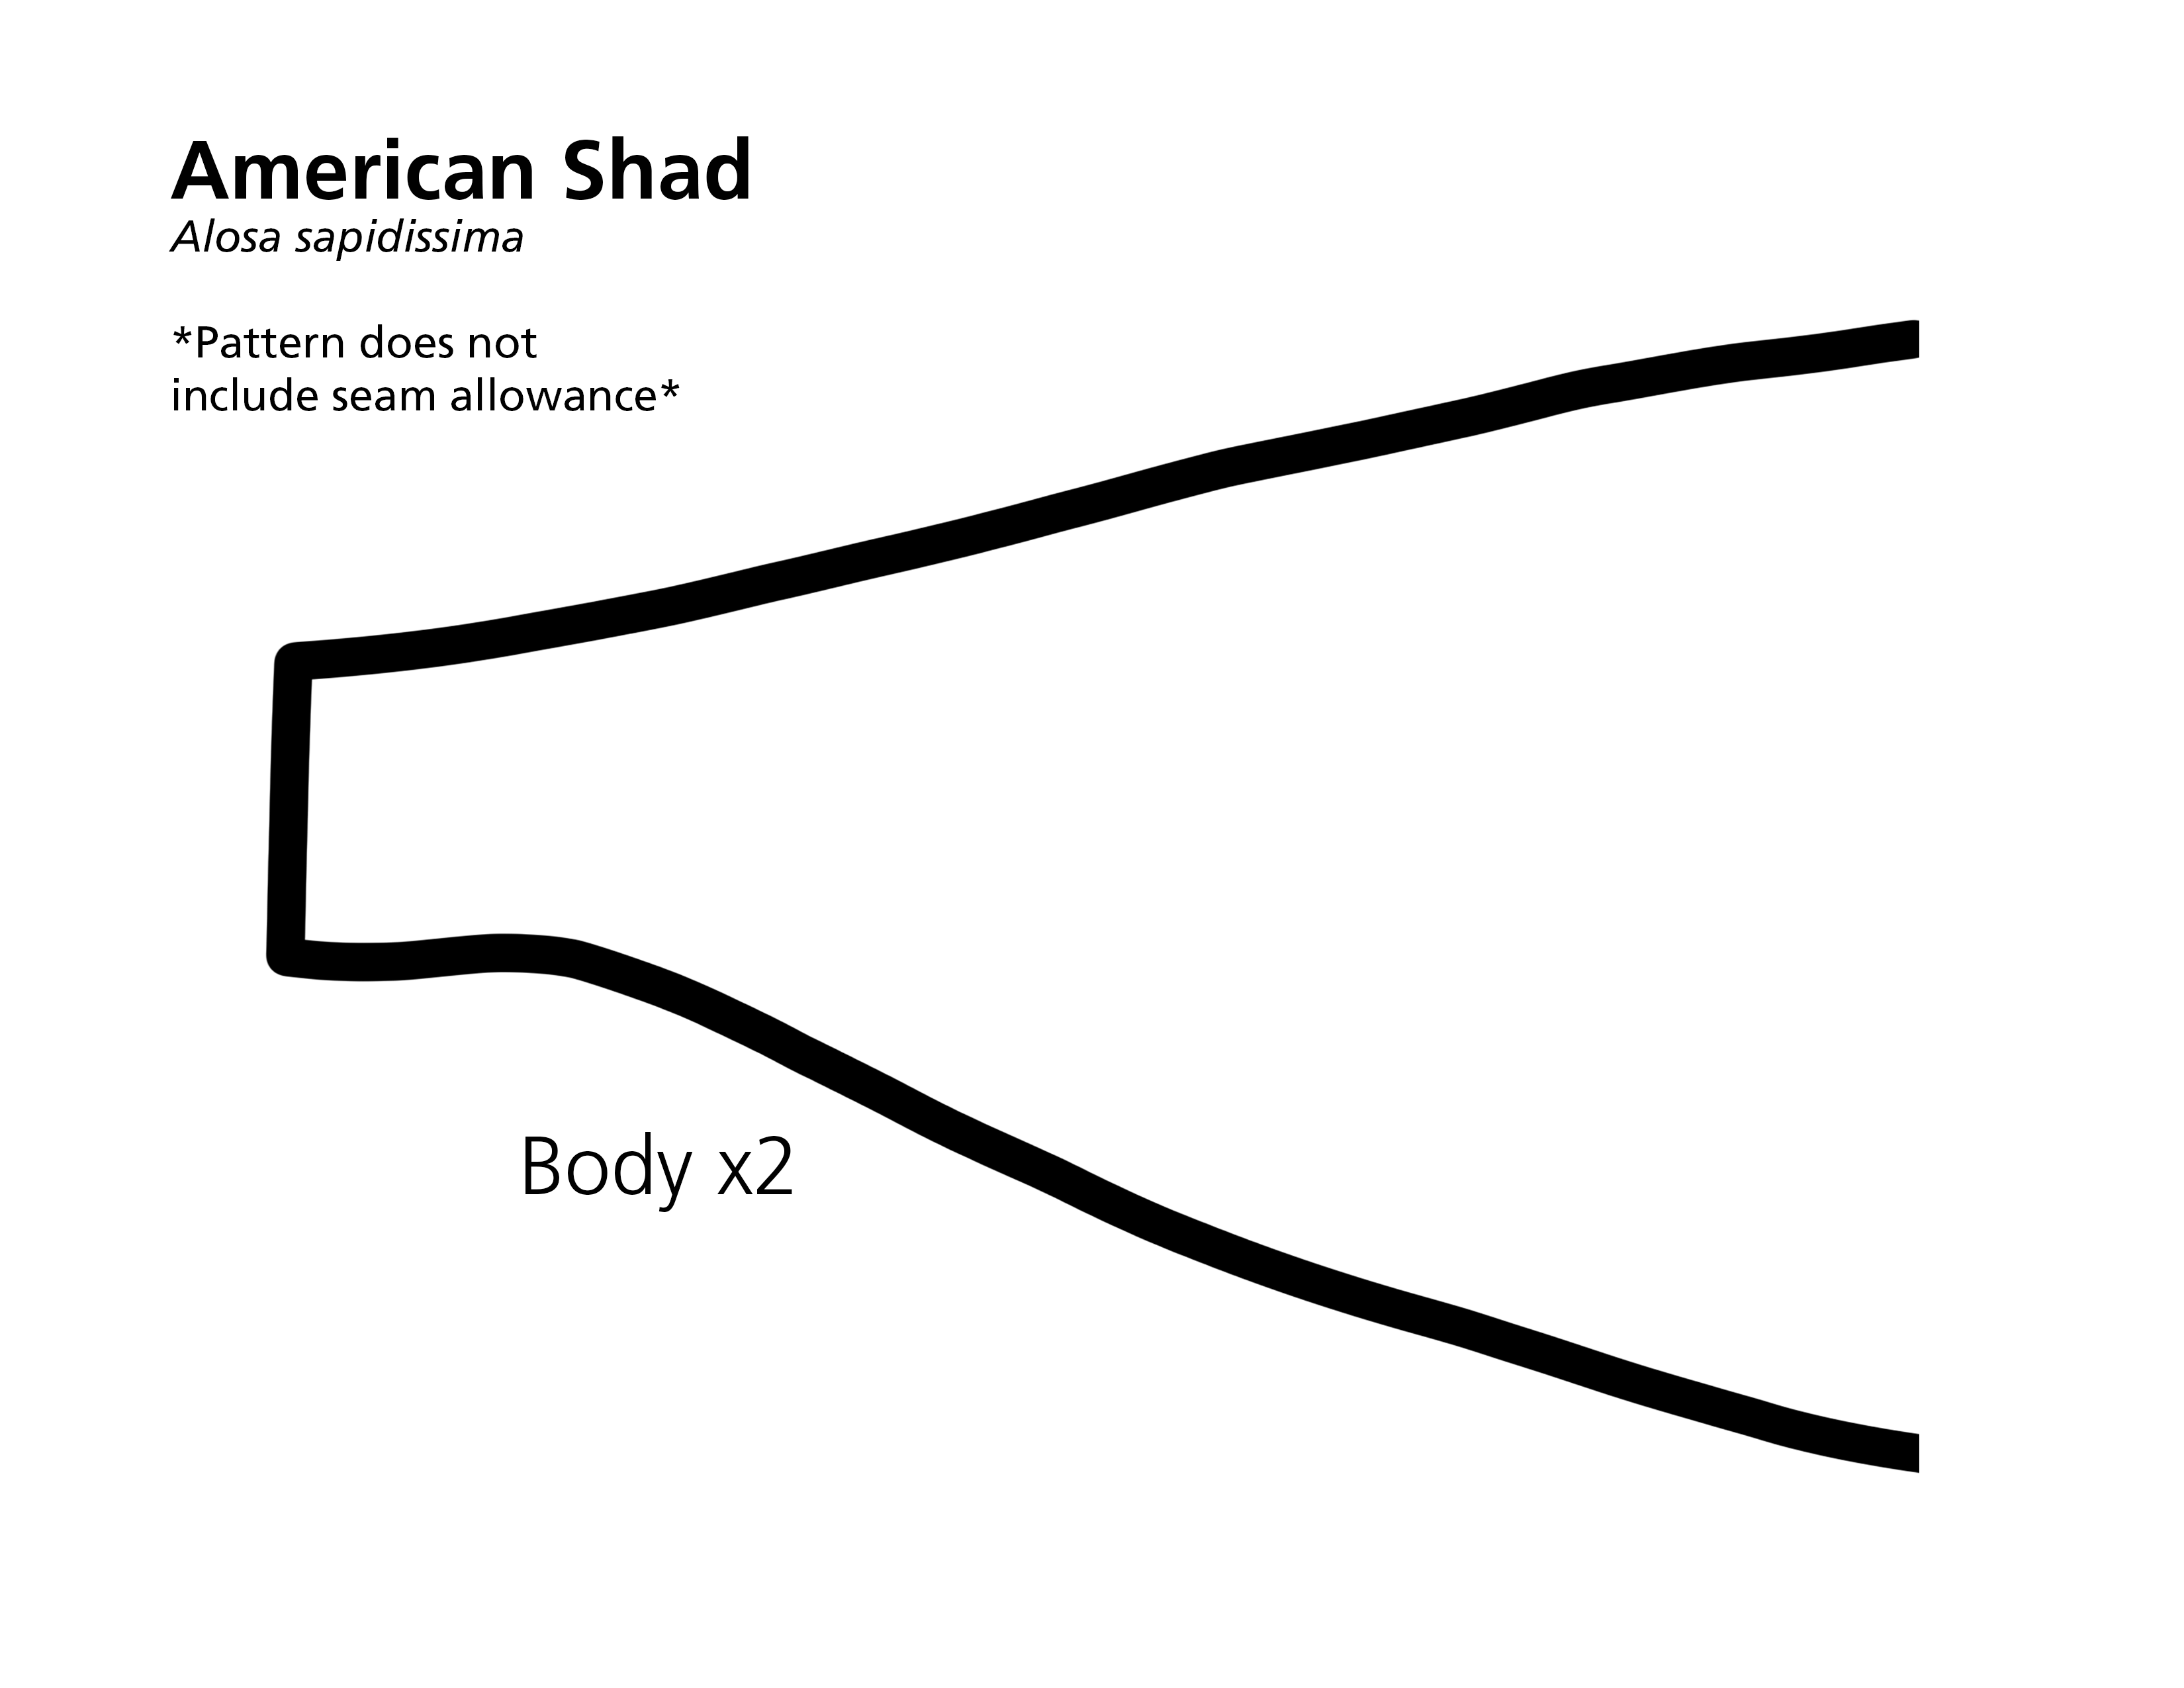
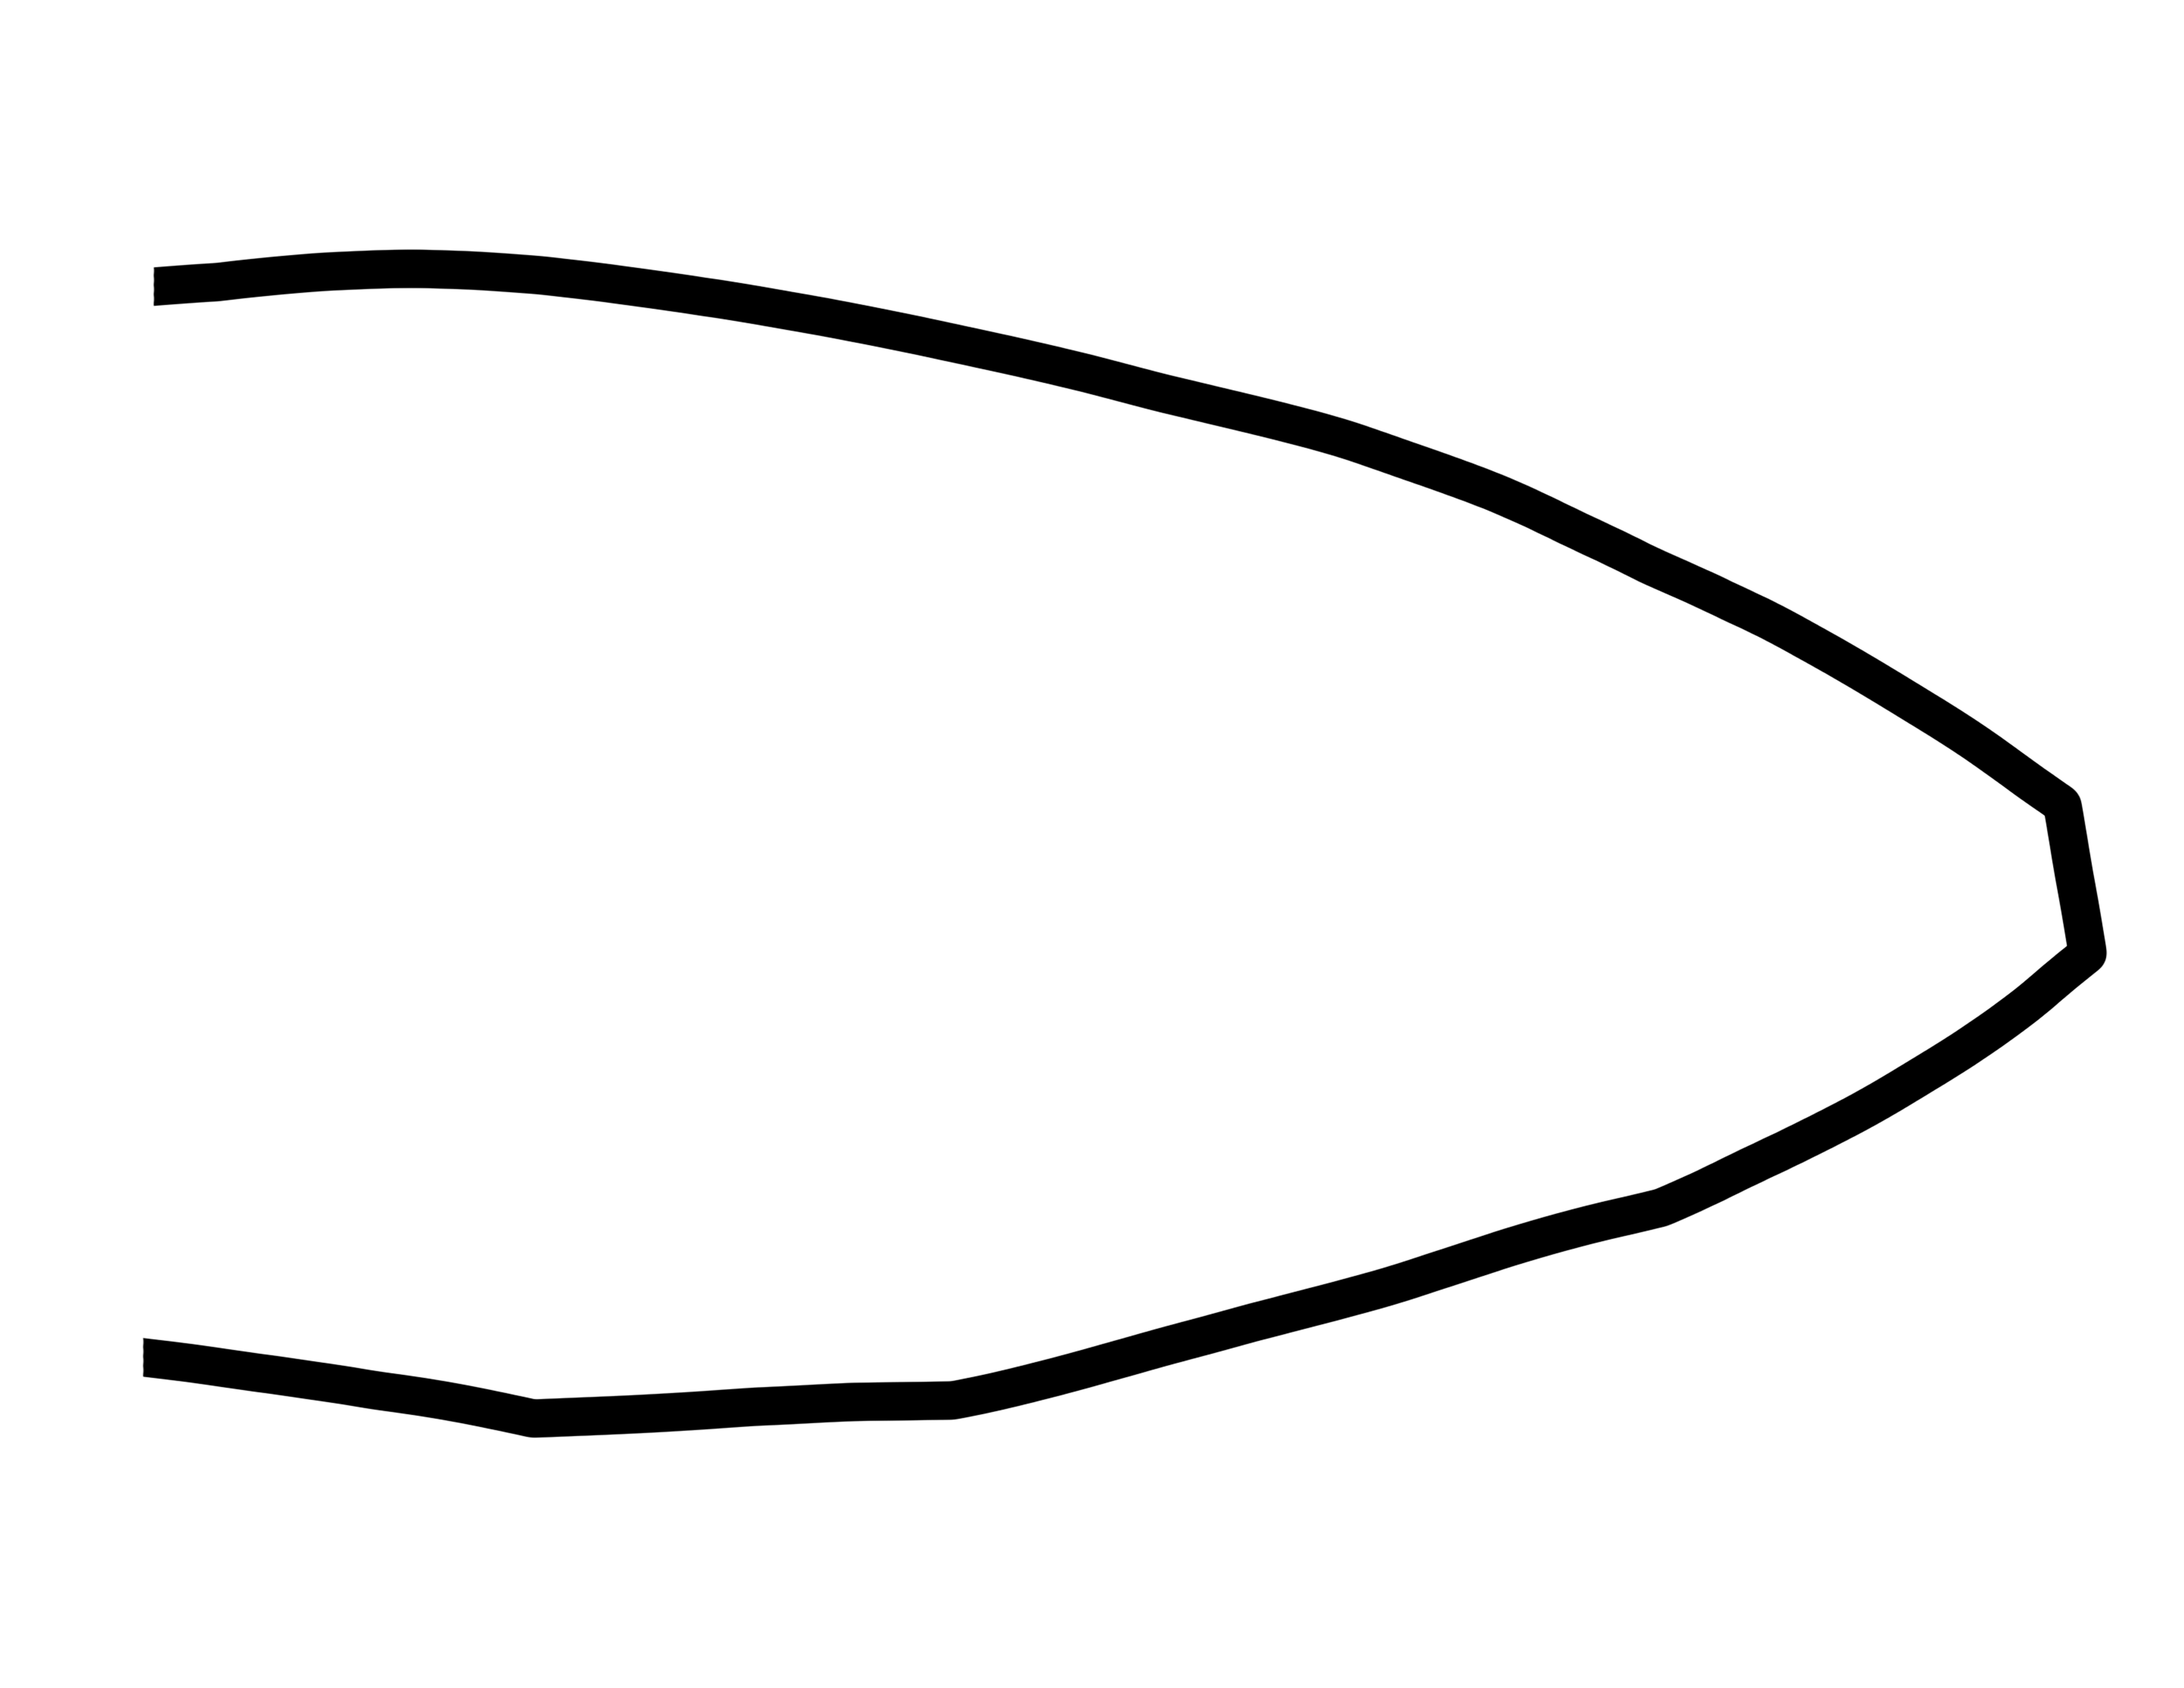
- Print the pattern (at the bottom of this page), making sure to print the images at full scale. If you don't have a printer, try tracing from your computer screen. Cut out the pattern pieces, cutting on the outside of the black line.
- Match up the two body pieces and glue/tape them together.
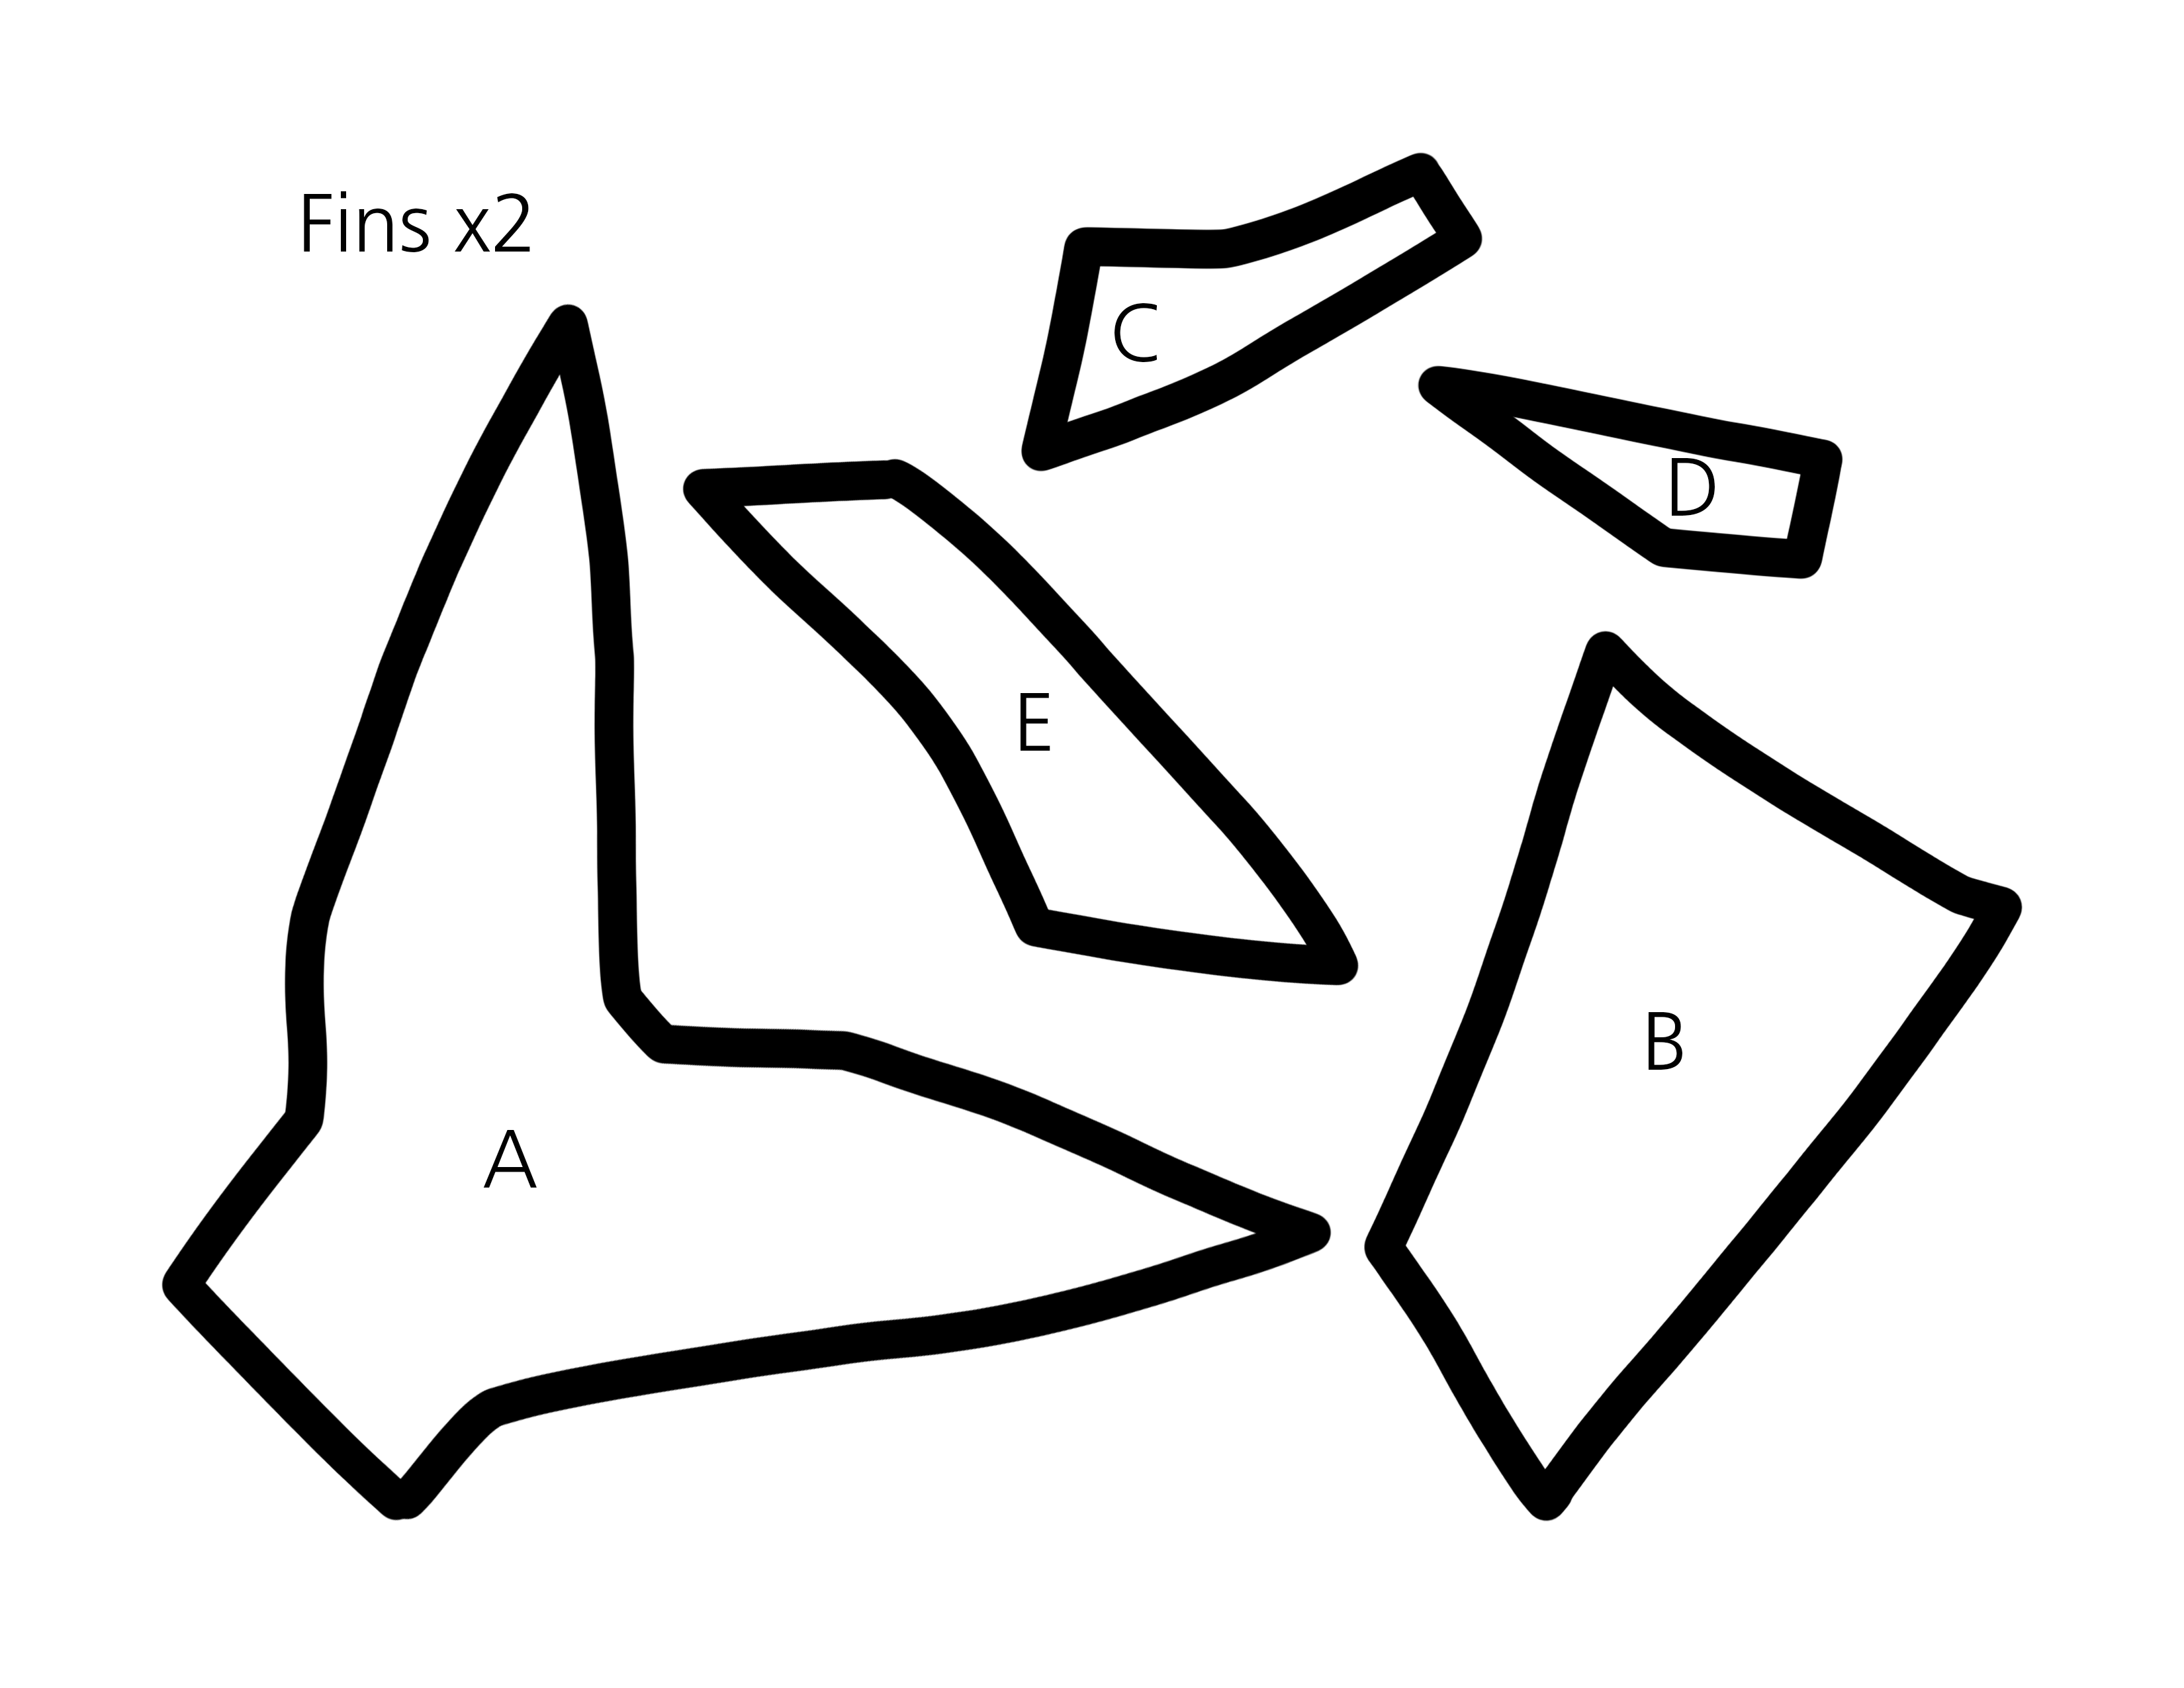
- Iron your fabric and lay it out with the right side facing down. Place the body pattern on the fabric and pin to secure. Then trace the pattern with tailer’s chalk or another marking tool (do not use a marker, it may bleed through to the front of the fabric). Flip your pattern piece over so that it is facing down and trace a second body piece. It is important to flip your pattern so that the two pieces match up on the right side. Repeat this process with each of the fin pieces.
- Cut out the pieces, being sure to keep them in their pairs with the pattern cutouts on top to avoid confusion. Don’t throw away the scraps! You'll use them to stuff the fish later.
Prepare the body
- Now it’s time to get creative! Use buttons, embroidery, fabric paint, natural materials, or other methods to add detail one of the body pieces of your American Shad. Make sure you add your decorations on the right side of the fabric.
- The example above has buttons eyes and spots. You could also play with color – shad are iridescent and can have pink, blue, purple, and green colors in their scales.
Prepare the fins
- Match up corresponding fin pieces with the right sides together. If using interfacing or quilting, place it on top of the sandwich.
- Using the lines you drew when tracing the pattern, sew each fin together, leaving an area open to turn them inside out. You should leave the opening on the part of the fin that touches the body of the fish. It will get closed up later when we sew everything together.
- Trim off the excess seam allowance, especially at the corners, and turn your fins inside out. Make sure to turn out the corners as much as possible using a pencil or something similar. Iron, then sew a few lines over top to mimic the appearance of real fins.
Sew and assemble the fish
- Sew fin "D" onto the side of the body that you decorated in the location indicated by the diagram at the bottom of this page.
- Lay out one body piece with the right side facing up. Arrange the fins on the body as shown in the diagram. Make sure that the tail lines up with the body, cutting away any excess fabric, and then place the tail to the side. Next, flip the remaining fins over so that they are facing inwards. The dorsal fin has a generous seam allowance so you can decide how tall you want it to be. Place the second body piece over top with the right side facing inwards. Pin this all together, making sure to secure the fins.
- Sew along the body using the line you marked, leaving one opening at the end of the tail and another opening at the bottom front of the fish large enough to reach inside when you add the stuffing.
- For the tail, turn in the raw edges of the opening you left to create a cuff. Place the tail inside the cuff and sew a line over top to join the pieces.
- Finally, it’s time to stuff! Add your stuffing, making sure to get as even a distribution as possible.
- Finish by sewing up the opening. You’re now the proud owner of an Atlantic Shad!
Learn more about Chesapeake Bay wildlife.
Please let us know if you make this pattern, or if you find a mistake!


